
The upgrade system at a glance
Upgrades are the engine of IGTAP. You run courses yourself, record a route, and then let an army of clones replay that route to generate watts (w), the orange currency shown in the POWER panel. Every kiosk you find in the facility exists to make that loop produce more power, either by strengthening a single course or by boosting your entire operation globally. The POWER panel actually tracks three resources: orange w (power), plus green gp and purple np, whose official names are unconfirmed.
Upgrades are bought at physical kiosks placed around the facility, not in a menu. Each course area has its own row of kiosks, and later areas introduce new upgrade families entirely: statue-room globals, secret upgrades hidden in the map, the atom conversion kiosk, and the upgrade tree. Costs are paid in watts and scale with the K/M/G/T/P prefixes you see in the power counter, so an upgrade that costs a few kilowatts early on can reach petawatt territory later.
This page catalogs what each upgrade type does. For which ones are worth buying first, see the upgrade order and best upgrades guides.
The seven course upgrade kiosks
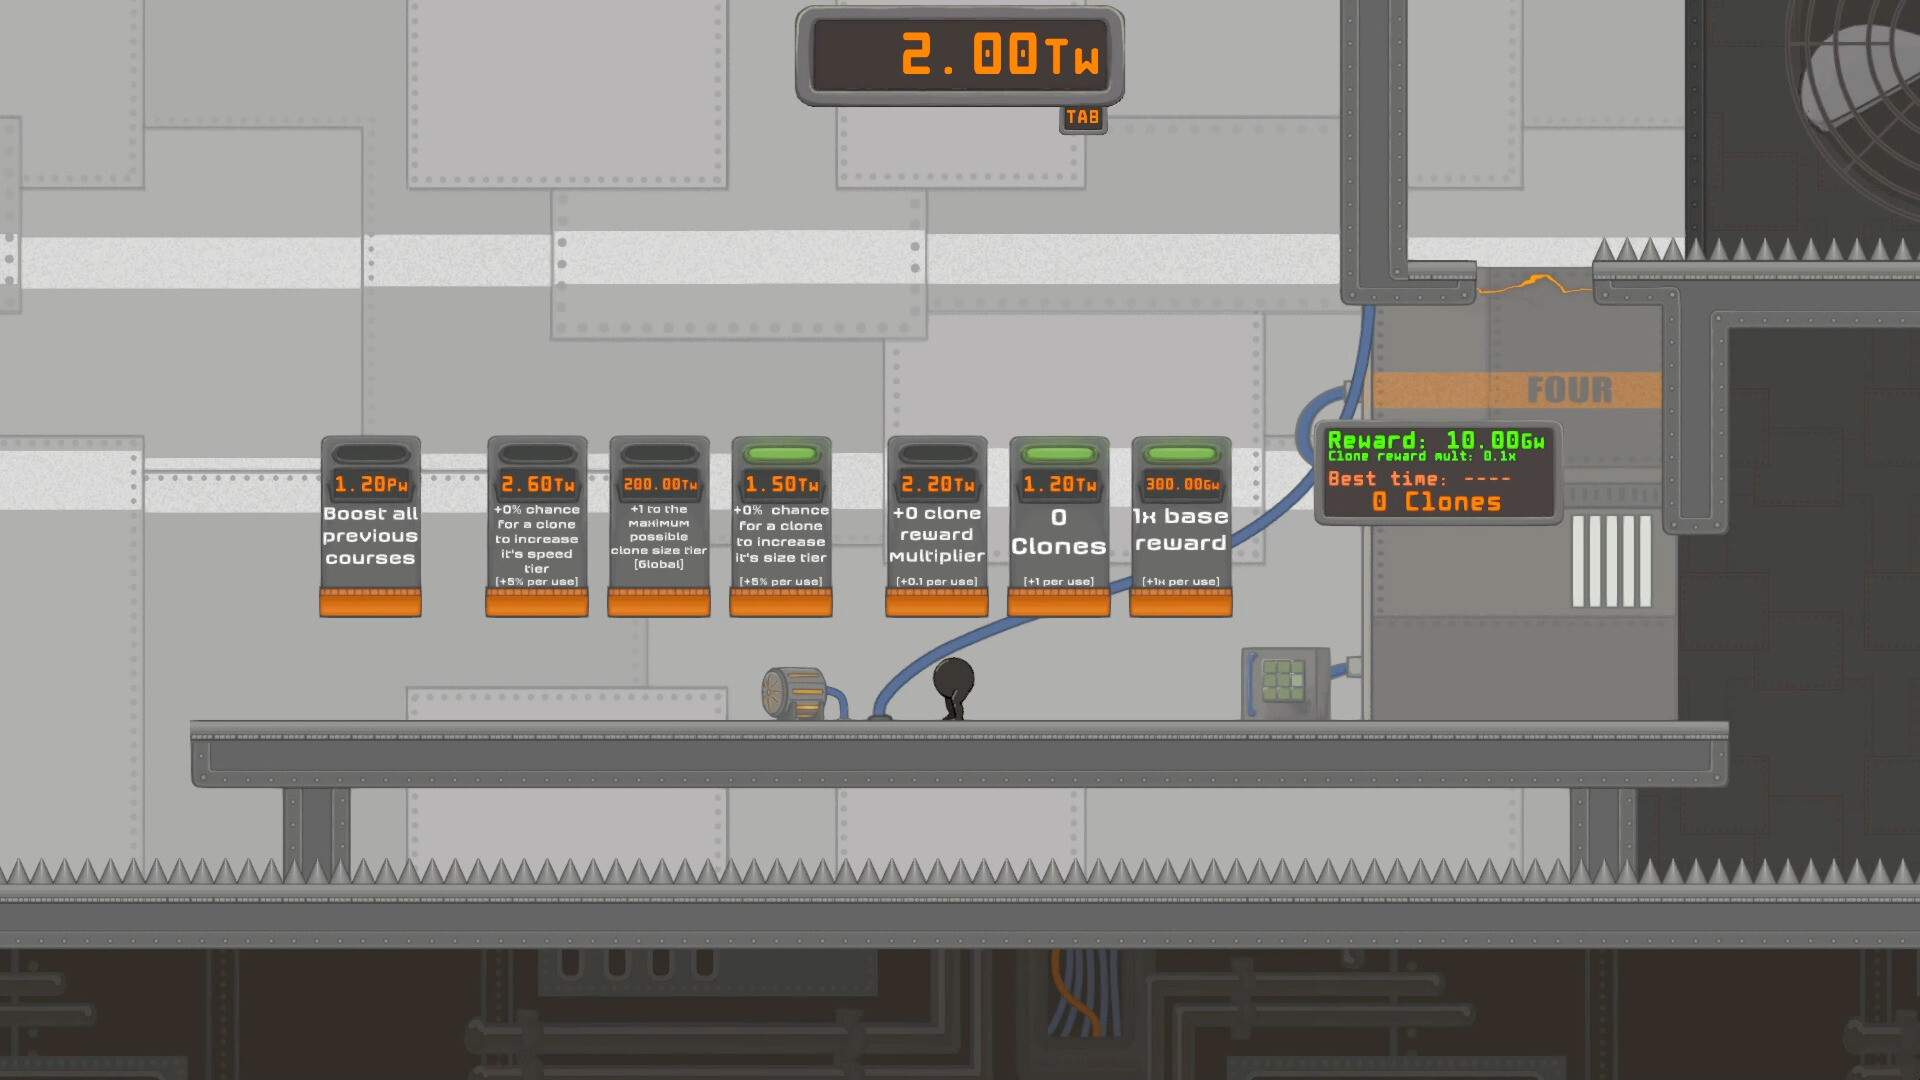
Every course area offers the same seven upgrade types, using the official kiosk names shown in the game:
- Boost all previous courses — raises the payout of every course you have already set up, instead of just the one you are standing in.
- Base reward (Xx base reward, +1x per use) — increases the watts paid out each time a course is completed, by you or by a clone.
- +Clones (+1 per use) — adds another clone that runs the recorded route on loop.
- Clone reward multiplier (+0.1 per use) — multiplies what each clone earns per completion. A fresh course starts at 0.1x, as seen on the completion panel in the official screenshots.
- Clone speed tier chance (+6% per use) — each purchase adds percent chance for a clone to increase its speed tier when it spawns, so more clones run the route faster.
- Clone size tier chance (+6% per use) — the same idea for size: a chance for a clone to increase its size tier on spawn.
- Maximum clone size tier [Global] — adds +1 to the maximum possible clone size tier across your whole save, raising the ceiling the size-chance upgrades roll against.
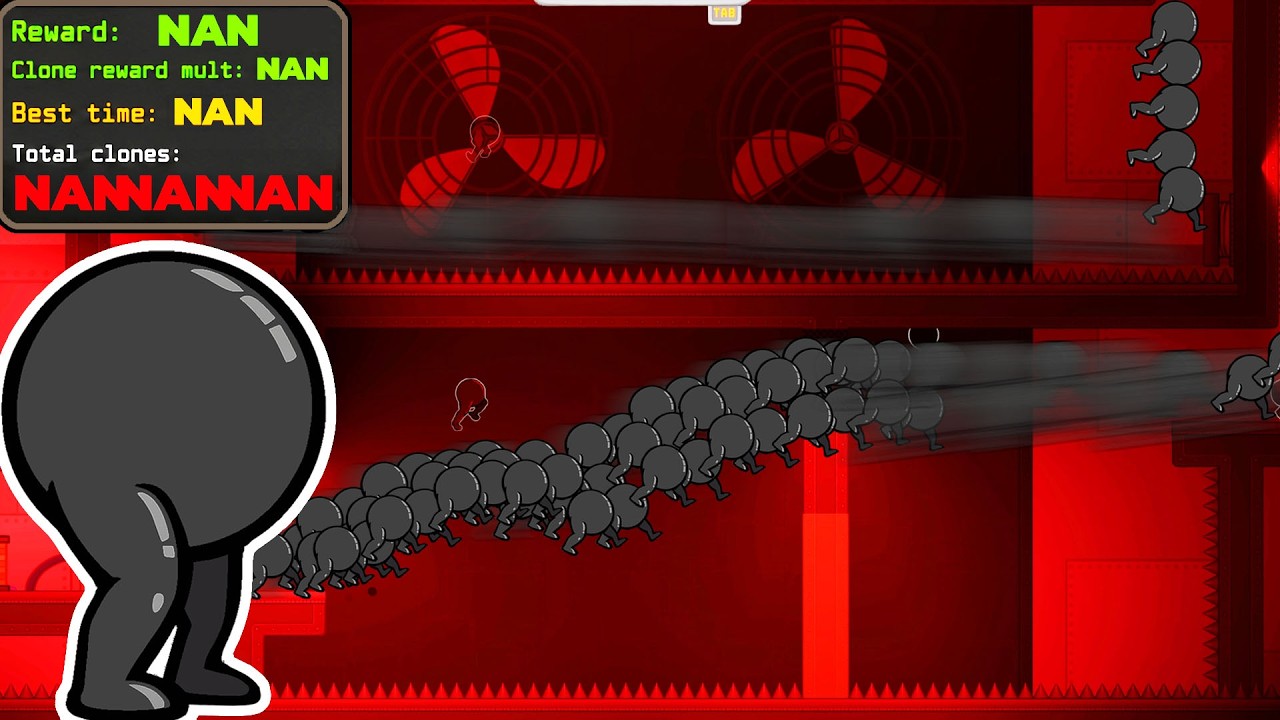
The per-use increments (+6%, +0.1, +1 clone, +1x) are printed on the kiosks themselves, and later in the game many of these can be bought in bulk. Clone-related upgrades only affect the course they are bought at, which is why revisiting old courses after a global boost matters so much.
Statue room globals
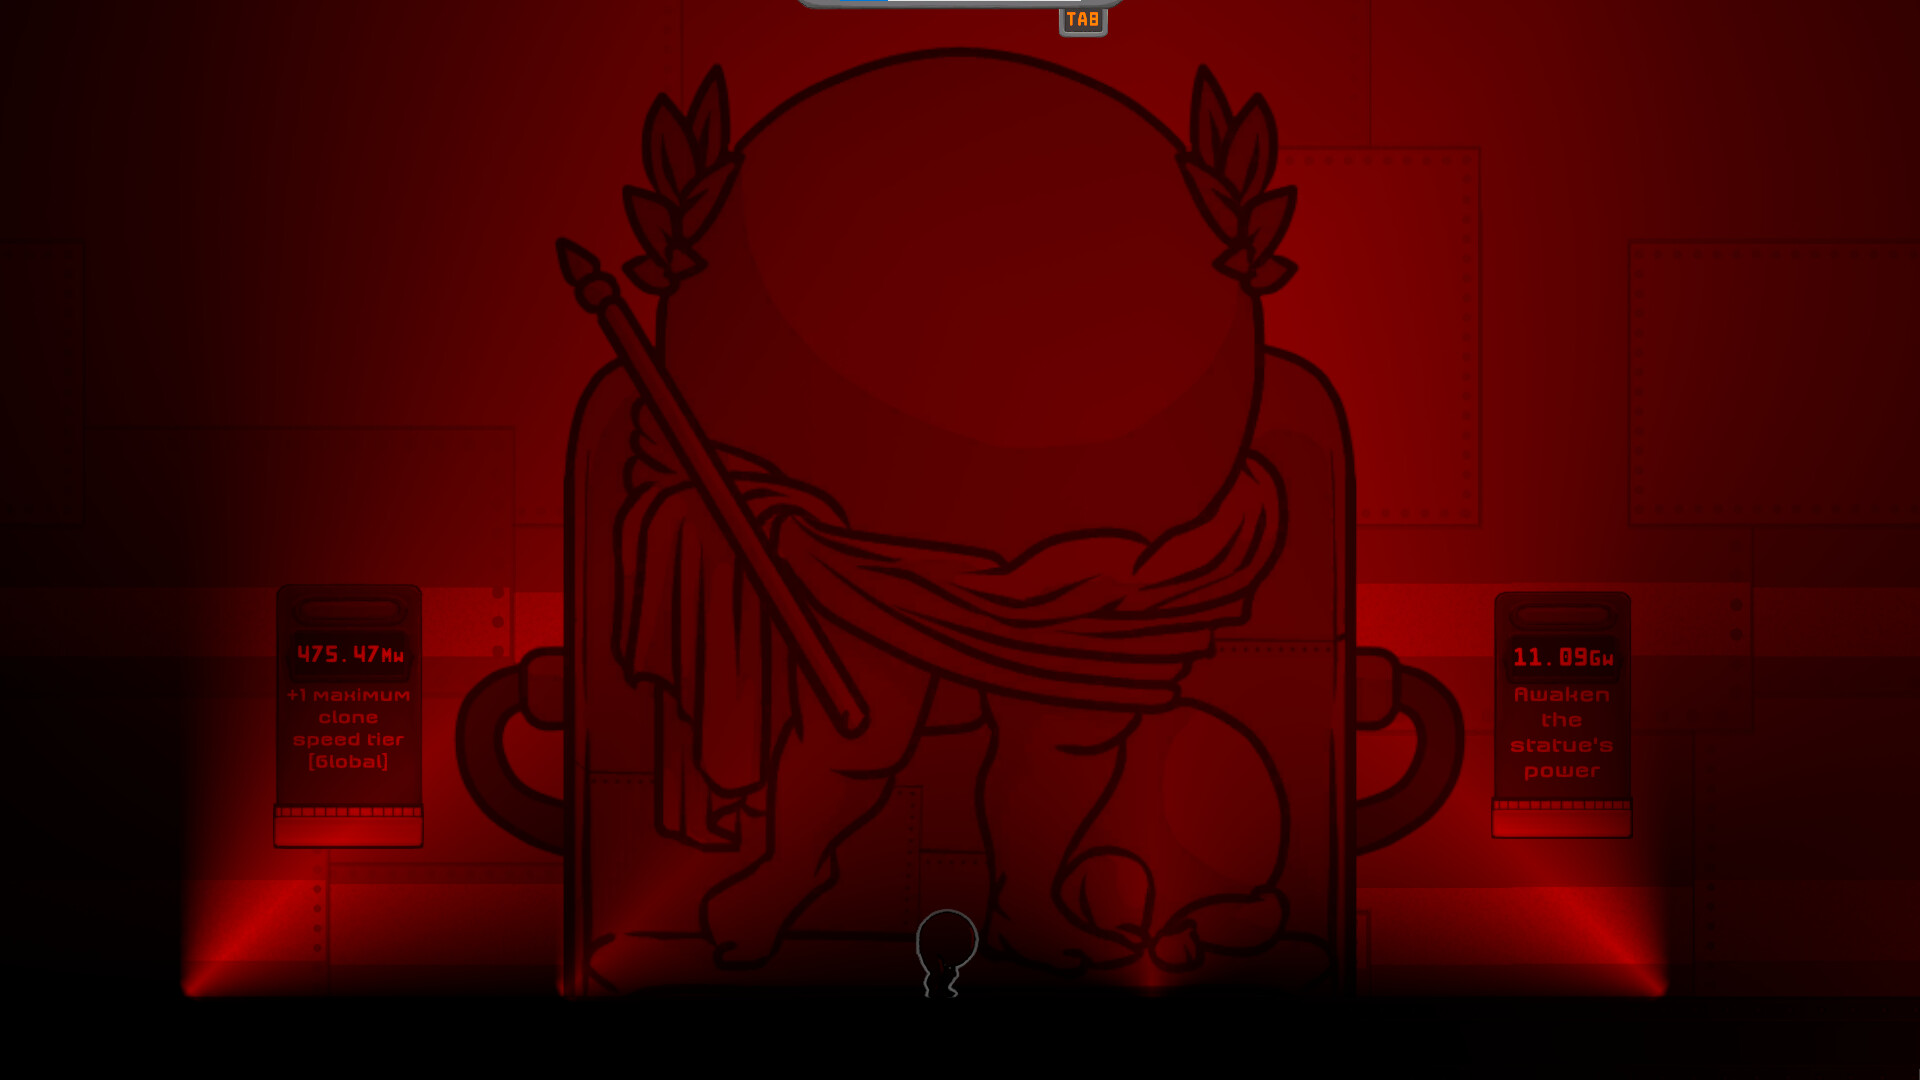
Deeper in the facility you reach a red statue room with two special kiosks that behave differently from the per-course upgrades.
The first is Awaken the statue's power, priced at 11.09Gw as seen in the official screenshot. Buying it triggers a major progression event for your save; community playthroughs report that awakening the statue applies a boost to all previous courses, making it one of the biggest single purchases in the facility.
The second kiosk, +1 maximum clone speed tier [Global], costs 475.47Mw as seen in the official screenshot. It is the speed-side counterpart of the maximum clone size tier kiosk: instead of improving the chance that a clone rolls a higher speed tier, it raises the maximum tier any clone can reach. Global tier upgrades stay relevant forever, because they lift the ceiling for every clone on every course, including ones you recorded long ago.
Movement abilities are upgrades too
IGTAP's twist is that your platforming skills are part of your build. Movement abilities are unlocked with power and tracked by achievements: wall jump (Wall jumping), dash (Spintap), double jump (Jump, but again.), block polarity swap (Polar increments), teleporters (Collapsing the state), zip movers (Metal in motion), and the omni-dash (All angle igtap).
These count as upgrades because your clones replay your recorded route at your best time. Every ability that lets you cut a corner, skip a hazard, or take a shortcut lowers your best time, and a faster best time means every clone completes the course more often. Community players consistently describe this as the core skill-to-income loop: the better you platform, the richer your idle production becomes.
Abilities also gate access. New courses, the statue room, and hidden areas are locked behind specific moves, so spending watts on movement is spending watts on content — and on the upgrade kiosks that content contains.
Secret upgrades
Scattered around the facility are secret upgrades that are not sold at kiosks; you find them by exploring off the obvious path. The achievement Not all those who wander are lost (find a secret upgrade) is earned by 92.1% of players, but Definitely not lost (find all secret upgrades) sits at just 1.1%, which tells you how spread out and well hidden the full set is.
Community playthroughs show secret upgrades granting things like permanent global watt bonuses — one frequently mentioned find gives a flat percentage increase to all watts earned — and some are free to claim once you can physically reach them. Others require advanced movement tech such as the dash wall jump to access.
Because they are global and often cheap or free, secrets are among the highest-value upgrades in the game per watt spent. They are easy to miss, though, so it is worth checking ledges, corners, and out-of-the-way shafts whenever you gain a new movement ability that opens old terrain.
Atoms, the upgrade tree, and refresh orbs
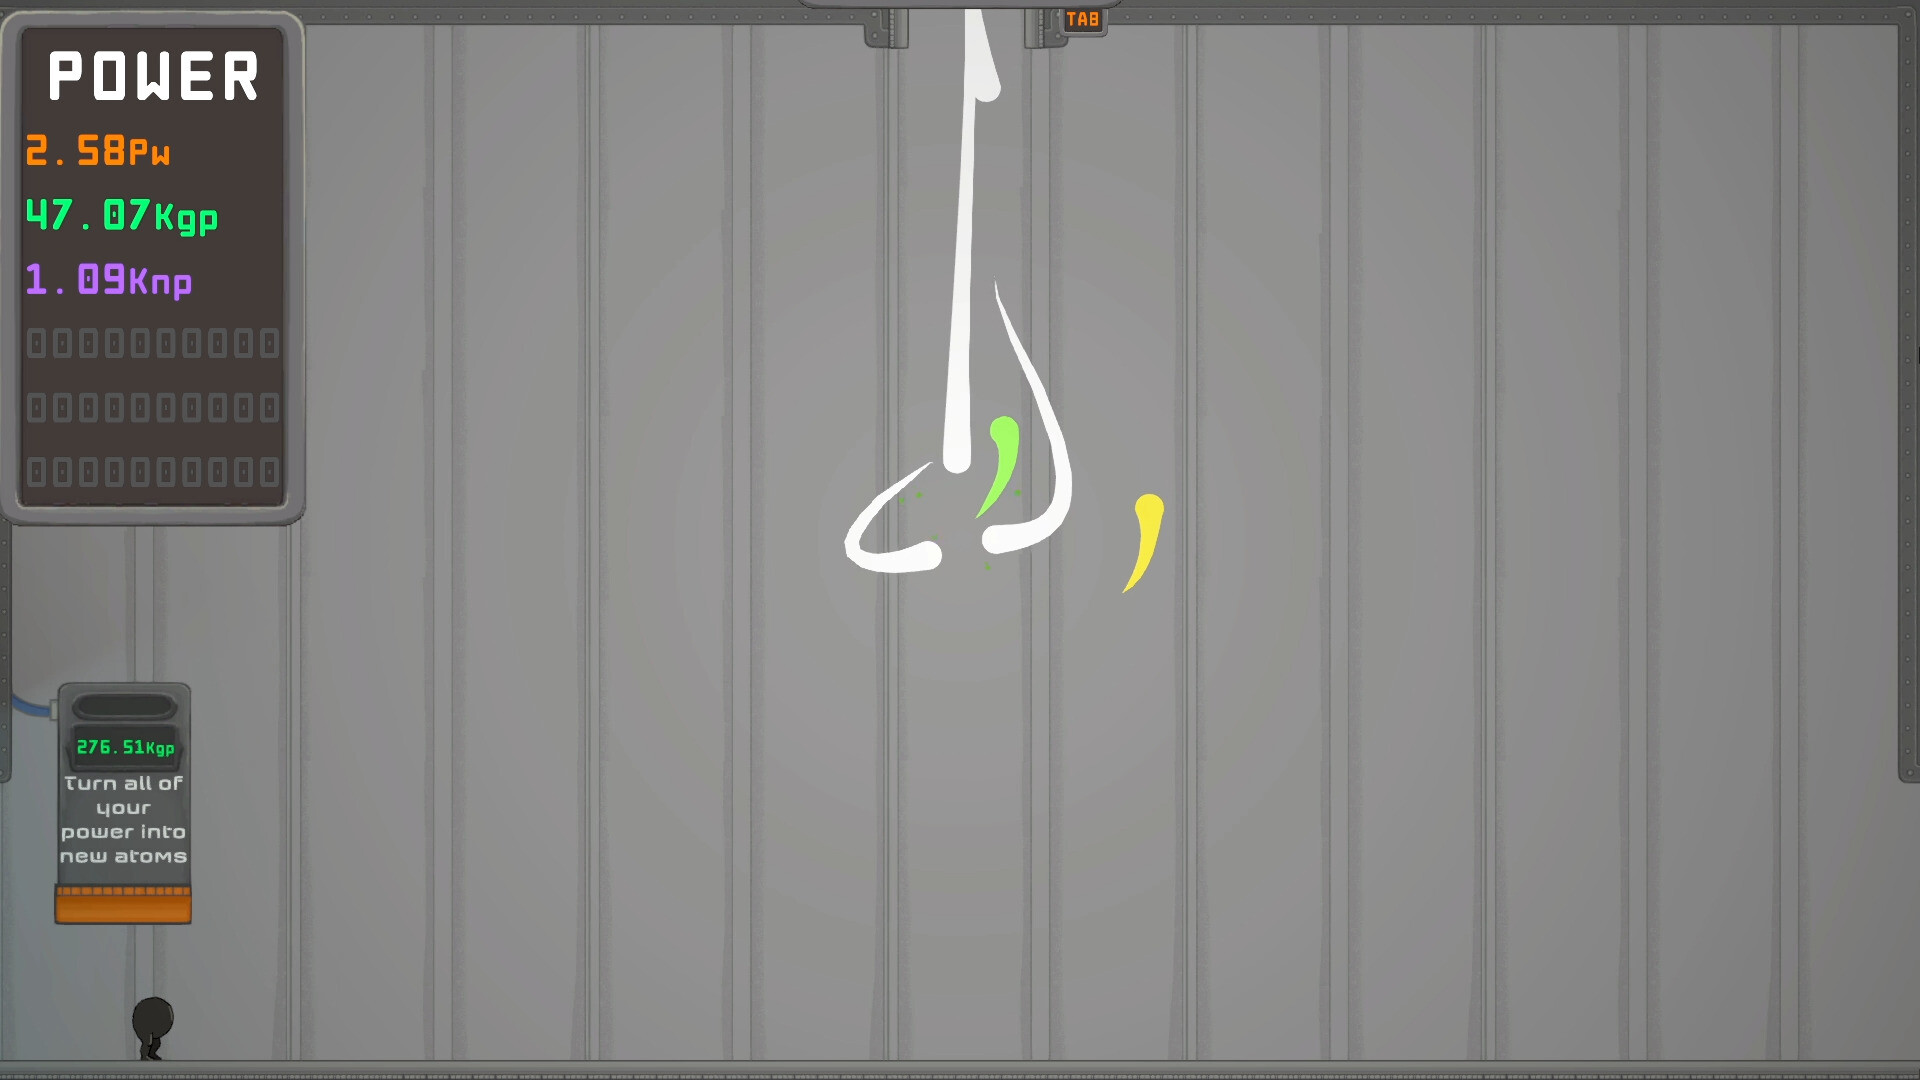
Late in the run, upgrades shift from watts to a prestige-style system. The kiosk Turn all of your power into new atoms (priced in gp — 276.51Kgp as seen in the official screenshot) converts your accumulated power into atoms. Buying your first atom earns the achievement I am igtapic. (61.0% of players). Atoms feed a separate economy tied to the green gp and purple np resources on the POWER panel.
The other late-game system is the upgrade tree. You plant it with the achievement Exponential growth (60.9% of players) and complete it with Environmental Energy — fully grow the upgrade tree — which only 6.8% of players reach, marking it as a genuine long-term goal. Community playthroughs show the tree offering powerful global upgrades purchased with np and gp, including quality-of-life boosts and multipliers that dwarf anything the watt kiosks sell.
Finally, refresh orbs are unlocked via the Stem Cells achievement (50.4% of players). They sit alongside other late facility machinery such as the breaker (Overdraw — trip the breaker) and the zip movers, and they reward players who keep exploring after the main course list is exhausted.
How upgrades interact with courses
Upgrades never work in isolation. Base reward raises the payout per completion; clone reward multiplier scales what clones keep from that payout; +Clones and clone speed tier chance determine how many completions happen and how fast; and the global tier and Boost all previous courses upgrades lift every course at once. Multiplying across all of these is why production explodes from single watts to the 2.00Tw-scale counters seen in official screenshots.
One interaction worth knowing, reported across community playthroughs: recording a new best time resets the clones currently running that course, since they must re-run the new route. Chasing a personal best is still usually worth it — a permanently faster route compounds — but expect a short production dip right after.
For deciding which of these to buy and when, continue with the upgrade order guide, or jump to the long-term build order for the full atom and upgrade-tree plan.